Disable Signed Driver Enforcement to Install Digitally Unsigned Driver on Windows 11/10
If you have an x64 architecture or 64-bit Windows computer and you are trying to install a digitally unsigned driver, chances are you might end up getting an error message saying Windows requires a digitally signed driver or A digitally signed driver is required. Microsoft uses such filters to provide top-notch security to the users. However, if you have a driver that is not digitally signed, you can follow this article to know how to disable signed driver enforcement and install a digitally unsigned driver in Windows 11/10/8/7.
What is a digitally signed driver?
Whenever you install new hardware like graphics card or anything else, you need to install a driver so that you can use that piece of hardware with your existing machine. Such drivers are equally required even if you export the entire existing Windows installation to another machine. When a driver is provided by the hardware manufacturer, that particular driver is digitally signed. In other words, a digitally signed driver is something like the “original” stamp that users can use to run the hardware and without worried about security.
However, sometimes you may need to install a driver that didn’t come from any hardware manufacturer, which you are currently using. For instance, if you try to install the ADB driver on your Windows machine, there is a chance of getting such an error message.
Although Windows has this built-in functionality to protect you from various malicious software and drivers like any other best anti-virus software, if you need the driver and you know the developer very well, these following steps would be helpful to bypass This driver is not digitally signed error message and install the driver within moments.
Method #1: Enable Test Mode to Install Digitally Unsigned Driver
You can enable Test Mode in Windows Vista 64-bit or later versions including Windows 11/10/8/7 using Command Prompt. The TESTSIGNING boot configuration allows or prevents all test-signed kernel-mode code in all 64-bit Windows computers.
To enable Test Mode in Windows 11/10/8/7/Vista, you can follow the following steps.
- Open the Command Prompt with administrator privilege. For that, search for cmd in the Start Menu or Taskbar search box > right-click on the respective result > select Run as administrator.
- After that, enter this command-
Bcdedit.exe -set TESTSIGNING ON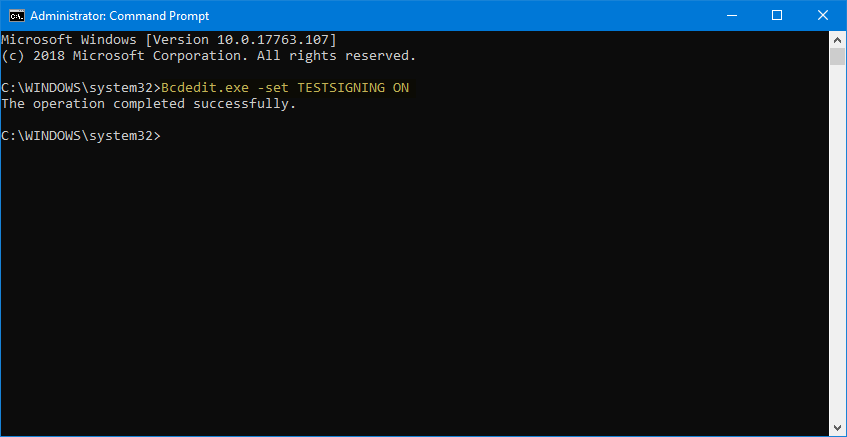
- You should get a success message. Once you get that, you need to restart your PC. It will take a couple of moments to boot your PC into Test Mode.
After entering the Test Mode, you should find a “Test Mode” watermark on your right-hand side.

If you have got such message, you can install the driver that was previously showing digital signature related issues.
To disable Test Mode in Windows 11/10/8/7/Vista, you need to follow these steps-
- Open Command Prompt as administrator and enter this command-
Bcdedit.exe -set TESTSIGNING OFF - Restart your computer to boot your PC into normal mode.
Method #2: Disable Driver Signature Enforcement and Install Digitally Unsigned Driver
You need to open the Advanced Startup Options where you will get an option to disable driver signature enforcement. This same menu helps you boot Windows 11/10/8/7 into Safe Mode. Before you proceed, make sure that you have already created a system restore point. In case, if you have not done this yet, just create a Windows system restore point to avoid any issue after installing the unsigned driver.
Follow the following steps to get Advanced Startup Options on Windows 11/Windows 10:
- Open the Settings Panel by pressing Win + I.
- Go to Update & Security > Recovery.
- Click the Restart now button under Advanced startup.
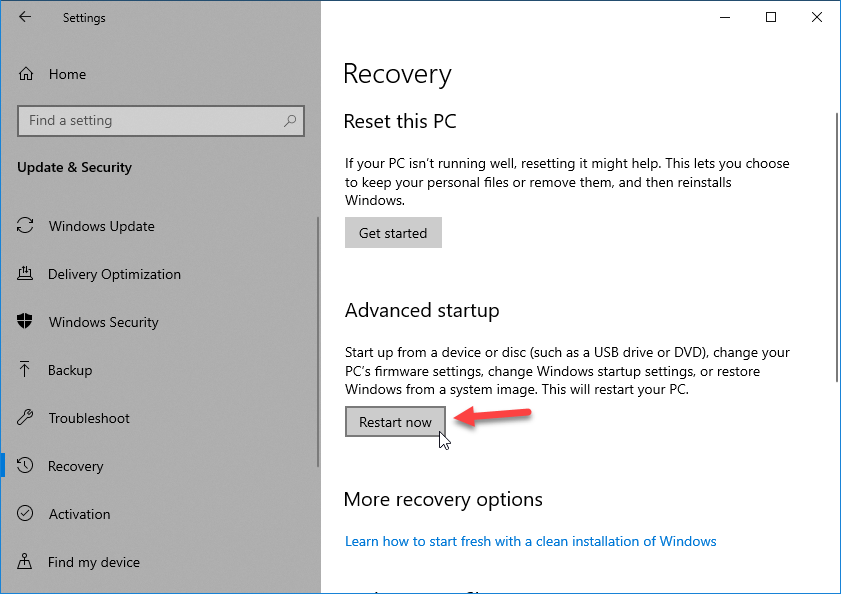
- Your computer will restart and you should find a window, where you need to select the Troubleshoot
- After that, choose Advanced options.
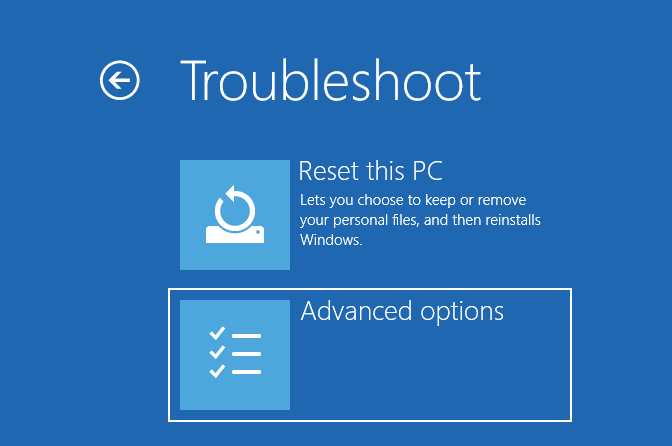
- Under the Advanced options, do select Startup Settings.
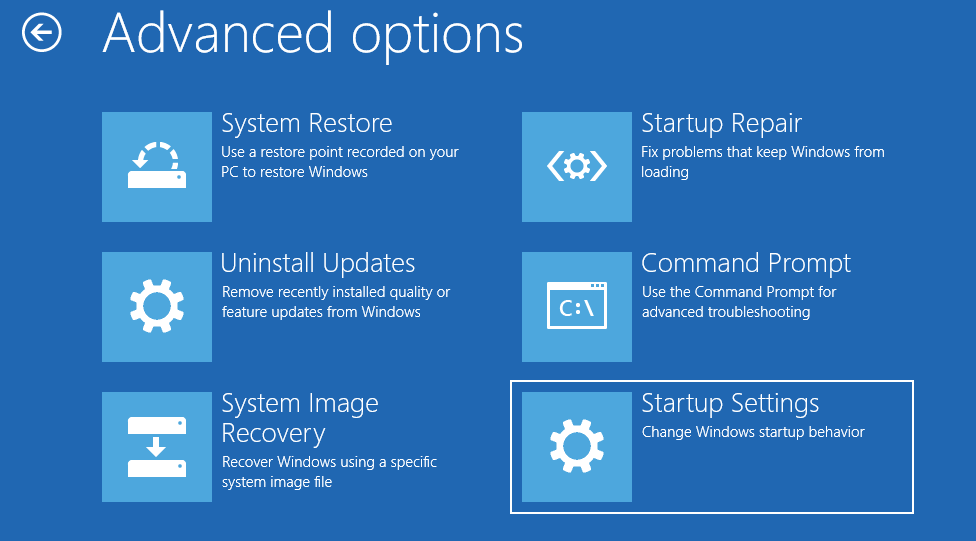
- You should find a Restart button that you need to click on.
- The next page will ask you to select the startup setting that you want. You should select Number 7 so that your PC boots without driver signature enforcement.
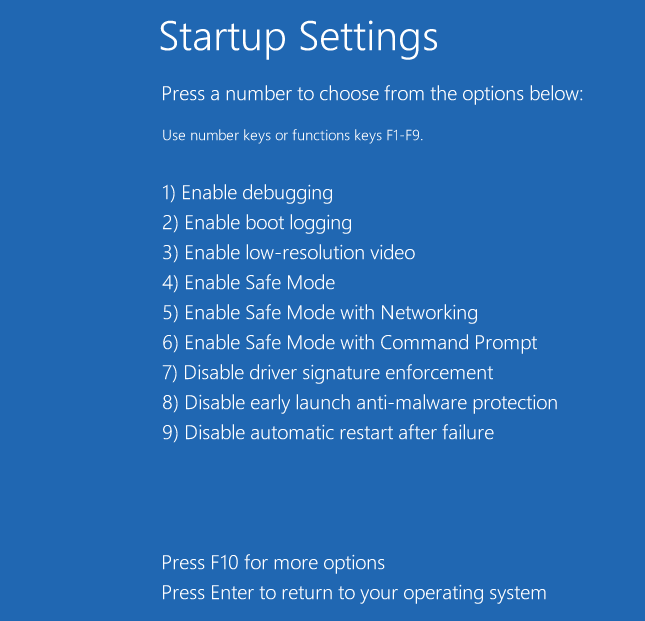
Once you click the Number 7, it will restart the PC. After that, you will be able to install the driver accordingly.
Wrap Up:
Although you can install an unsigned driver in 32-bit Windows computer, you cannot install the same on a 64-bit machine because of the test-signed kernel-mode requirements. Therefore, you must have to disable the driver signature enforcement by either boot PC into Test Mode or from Advanced Startup Options. If the pre-installed Windows Defender causes any issue during the time of unsigned Windows driver installation, you might need to disable or uninstall Windows Defender before any further proceedings.
Also Useful: How to fix Windows update service if it shows error


