How to Take Full Ownership of Files, Folders in Windows 10 / 7 / 8.1
As a Windows 10 user, it is necessary to know how you can take ownership of files and folders to get full access over those. Mainly when, we have limited access to a Windows system file and every time when we go for a tweak in such files, Windows always prevents us from doing any kinds of changes. We need these access also when a file was created using a user account and now the account is no more. Actually, taking ownership is a hard task and command line procedure is equally complicated. In this tutorial, I’ll show you how to take ownership of any file or folder and drive in Windows 10. By doing this a user will be allowed to get full access to any windows drive, folder and file. But, you need to get administrator access to follow the steps in this tutorial.
This tutorial is also useful to Windows 7, Windows 8 and Windows 8.1 users.
Take Ownership of Files, Folders in Windows 10 Manually
Without using any third-party software, you can take ownership of any drives, files and folders. Steps are as follows:
- Open the file or folder you want of taking ownership
- Right-click to that and select Properties
- Navigate to Security tab
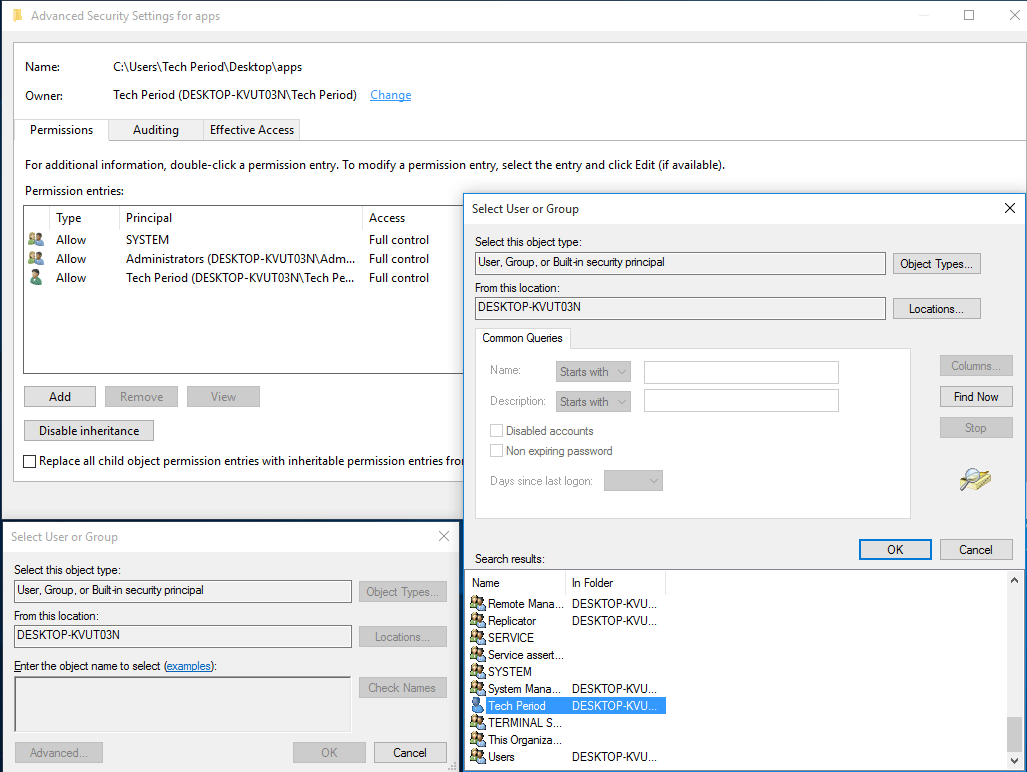
- Click to Advanced button to open Advanced Security Settings for Windows window
- You need to change the owner of the file. Click to the Change link beside owner level
- Select User or Group window will appear, click on Advanced button
- From the next window, click on Find Now button

- Select the user account from the search to make owner of the file/folder and double click on it to make the user name selection
- Click OK, Apply, OK
- Now, to view or change the permission of the user over that folder, right click on the folder again.
- Click Properties, navigate to security tab
- Click Advanced button, then click on Add button to open Permissions Entry for Windows section
- Under Principle option, choose select a principle link
- Click Advanced, Find Now, and choose the user you previously select
- Click OK to open basic permissions option and check all the boxes to get full permission
- Next to it, check Only apply these permissions to objects and/or containers with in this container option.
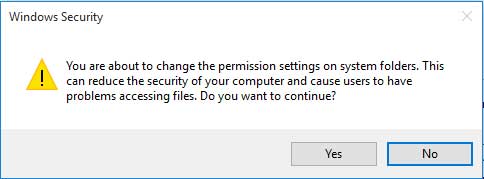
- Click on OK button. You may get the following notice as a pop up:

- Confirm it by pressing Yes button.
Now, you are done. Thus you can get full access to any file, folder or drive in Windows 10 and take ownership of it.
Add Take Ownership Option to Right-Click Context Menu of Windows 10
By adding the following code to Windows registry you can easily add ‘Take Ownership’ option to right click option when you click on a file or folder of Windows 10.

Windows Registry Editor Version 5.00

[-HKEY_CLASSES_ROOT\*\shell\runas]

[HKEY_CLASSES_ROOT\*\shell\runas]
@="Take Ownership"
"HasLUAShield"=""
"NoWorkingDirectory"=""
"Position"="middle"

[HKEY_CLASSES_ROOT\*\shell\runas\command]
@="cmd.exe /c takeown /f \"%1\" && icacls \"%1\" /grant administrators:F /c /l & pause"
"IsolatedCommand"="cmd.exe /c takeown /f \"%1\" && icacls \"%1\" /grant administrators:F /c /l & pause"


[-HKEY_CLASSES_ROOT\Directory\shell\runas]

[HKEY_CLASSES_ROOT\Directory\shell\runas]
@="Take Ownership"
"HasLUAShield"=""
"NoWorkingDirectory"=""
"Position"="middle"

[HKEY_CLASSES_ROOT\Directory\shell\runas\command]
@="cmd.exe /c takeown /f \"%1\" /r /d y && icacls \"%1\" /grant administrators:F /t /c /l /q & pause"
"IsolatedCommand"="cmd.exe /c takeown /f \"%1\" /r /d y && icacls \"%1\" /grant administrators:F /t /c /l /q & pause"


[-HKEY_CLASSES_ROOT\dllfile\shell\runas]

[HKEY_CLASSES_ROOT\dllfile\shell\runas]
@="Take Ownership"
"HasLUAShield"=""
"NoWorkingDirectory"=""
"Position"="middle"

[HKEY_CLASSES_ROOT\dllfile\shell\runas\command]
@="cmd.exe /c takeown /f \"%1\" && icacls \"%1\" /grant administrators:F /c /l & pause"
"IsolatedCommand"="cmd.exe /c takeown /f \"%1\" && icacls \"%1\" /grant administrators:F /c /l & pause"


[-HKEY_CLASSES_ROOT\Drive\shell\runas]

[HKEY_CLASSES_ROOT\Drive\shell\runas]
@="Take Ownership"
"HasLUAShield"=""
"NoWorkingDirectory"=""
"Position"="middle"

[HKEY_CLASSES_ROOT\Drive\shell\runas\command]
@="cmd.exe /c takeown /f \"%1\" /r /d y && icacls \"%1\" /grant administrators:F /t /c /l /q & pause"
"IsolatedCommand"="cmd.exe /c takeown /f \"%1\" /r /d y && icacls \"%1\" /grant administrators:F /t /c /l /q & pause"


[-HKEY_CLASSES_ROOT\exefile\shell\runas]

[HKEY_CLASSES_ROOT\exefile\shell\runas]
"HasLUAShield"=""

[HKEY_CLASSES_ROOT\exefile\shell\runas\command]
@="\"%1\" %*"
"IsolatedCommand"="\"%1\" %*"
Copy the above code to notepad file and save the file as takeownership.reg. Double click the file to install the script. You need to be signed in using the administrator account to install the script to Windows registry files. After successfully installation of the script, when you right click on a particular file, folder or Windows drive, you will see the Take Ownership option there at the context menu. However, you can uninstall the script any time and revert the changes by adding this script.
Windows Registry Editor Version 5.00

[-HKEY_CLASSES_ROOT\*\shell\runas]

[-HKEY_CLASSES_ROOT\Directory\shell\runas]

[-HKEY_CLASSES_ROOT\dllfile\shell\runas]

[-HKEY_CLASSES_ROOT\Drive\shell\runas]

[-HKEY_CLASSES_ROOT\exefile\shell\runas]

[HKEY_CLASSES_ROOT\exefile\shell\runas]
"HasLUAShield"=""

[HKEY_CLASSES_ROOT\exefile\shell\runas\command]
@="\"%1\" %*"
"IsolatedCommand"="\"%1\" %*"
Install Windows Application to Change Ownership of A File or Folder
With the help of Ownership Windows application, you can take ownership of files and folders any time. This is a freeware and easily available in Softpedia. Here is the download link:
http://www.softpedia.com/get/System/OS-Enhancements/Rizone-Take-Ownership-Shell-Extension.shtml
Just install the application and it will instantly add “Take Ownership” option to the right-click context menu of Windows 10.
See also:


